Loginizer plugin is an effective plugin to improve WordPress website security. It’s easy to configure the settings, and your website will be safe from bots as well as other malware. Installation is quick and simple. The plugin, however, provides only the brute force settings with the trial version. If you wish to utilize additional features in the plugin, you can buy the premium version.
Brute Protection offers high security on your login pages. It blocks IPs trying to hack your site for 15 mins after three unsuccessful login attempts. If multiple lockouts are attempted, it will disable the IP for up to 24 hours. Additionally, you can send errors to users who have more than a specific number of attempts to log in.
You can access the blacklist and whitelist IP addresses. These features are available within the version that is free. The pro version includes re-captcha, 2-way verification, password-free as well, as security options.
Password Less login offers simple access to login for customers. When you login, the username or email address will be requested to verify the account, as well as an email sent to that email associated with the account along with an indefinite link to log into.
2-Factor Authentication
There is also two-way authentication using email in the premium version. After login into the account, you will receive an email to your email associated with the account, along with a temporary six-digit code that will allow you to login.
Additionally, you can avail of two-way authentication using the application features as well.
This feature allows users are able to set up the account using a 2FA app such as Google Authenticator, Authy, etc.
You can also include Re-Captcha in the login and connect sections. The plugin supports Google’s re-captcha version 3 and v2 to the login screen Comment Section, Login Form as well as other forms. To prevent automatized brute-force attacks. In addition, it allows Woo-commerce to be used. If you want to stop new registrations coming into the domain you want to block, You can do this by using the brand new blacklist of registration domains feature.
It also has the option of auto-blacklisting IPs. This means that it will automatically block IPs in the event that specific usernames stored by the administrator are used to login by malicious bots or users. All of these features are available in the premium version.
Let’s look at the fundamental capabilities of this plugin.
Loginizer Features:
The plugin has a user-friendly interface with a quick and easy installation.
Loginizer only offers brute force protection options in its free version. If you wish to utilize the re-captcha feature and additional security options, you are able to move into the Pro version. Pro version.
But, there are several options to set up in your Brute Settings for Force. You can choose the limit value for retries, lockout times, and emails to notify you of changes.
In addition, you are able to issue error messages to users who tried to sign in or out for more than the limits.
It lets you blacklist particular IP addresses for users using this version for free. You can opt to have the auto-blacklisting feature integrated into its Pro version.
There is also two-way authentication using mail when you upgrade to version Pro version. It will then forward the mail to an email account associated with the accounts, along with the temporary code of six digits to verify the login.
The plugin supports Google’s re-captcha V3 and v2 configurations for the Login screen Comment Section, Registration Form with this plugin.
The plugin will automatically blacklist the IP addresses if certain usernames that are saved by the administrator are used to sign in by malicious bots or users.
Password-less login offers simple user login choices. When logging in your username, or email address will be requested for, as well as an email sent to that email associated with the account along with an indefinite link to log into the account. This feature is only available with version Pro version.
You can inform your contacts that your website is secured by the plugin’s brute protection feature by using Twitter.
The plugin also has the ability to create a page layer as well as WPcentral integration. We use Page layer builders to manage and create professional content and pages. In addition, WPCentral lets you manage multiple WordPress websites from one dashboard.
Pricing Details:
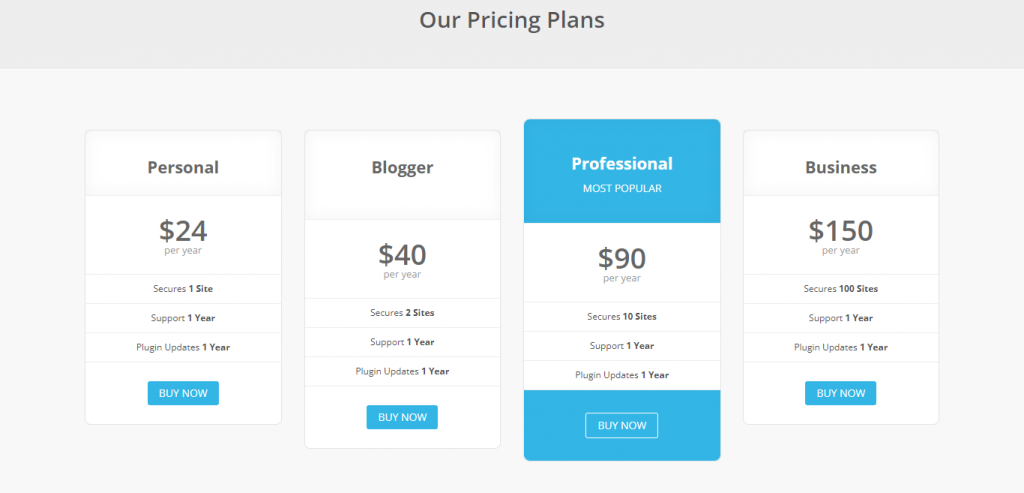
Loginizer offers four paid subscription plans, including blogger, personal professional, professional, and business plan. You can get the license for 100 sites. A personal plan is $24 annually. You will get the license for one website. The plan also includes one year’s worth of service as well as updates to plugins.
The Blogger plan costs $40 per year and includes a license for two websites. Additionally, the professional plan costs $90 per year and includes the option of ten sites. The business plan gives an unlimited license to 100 sites, which is $150.
How to Install and Activate Loginizer Plugin
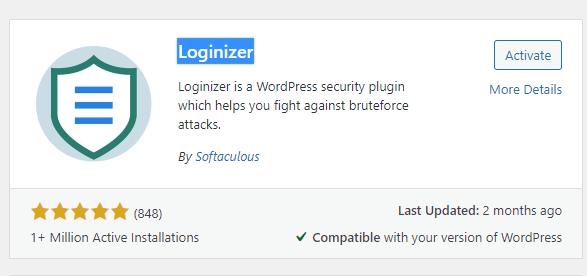
The process of installing the plugin is simple. After you have activated the plugin on your website, it is now possible to start using the plugin on your website. It is now time to configure your security settings on your site with this plugin. We’ve given a step by the procedure below on how to utilize this plugin.
Brute Force Settings
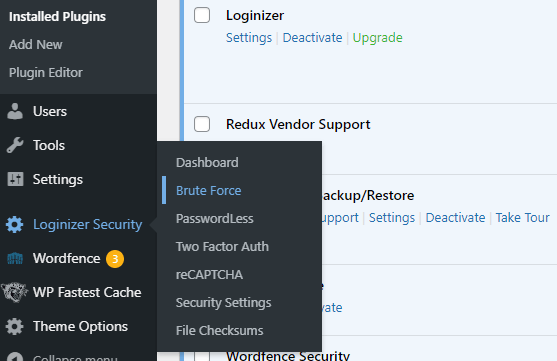
Step 1. The first step is to go to Step 1: First, select the “Loginizer Security” option that is located in the left-hand panel on your WordPress dashboard. Select ” Brute Force“.
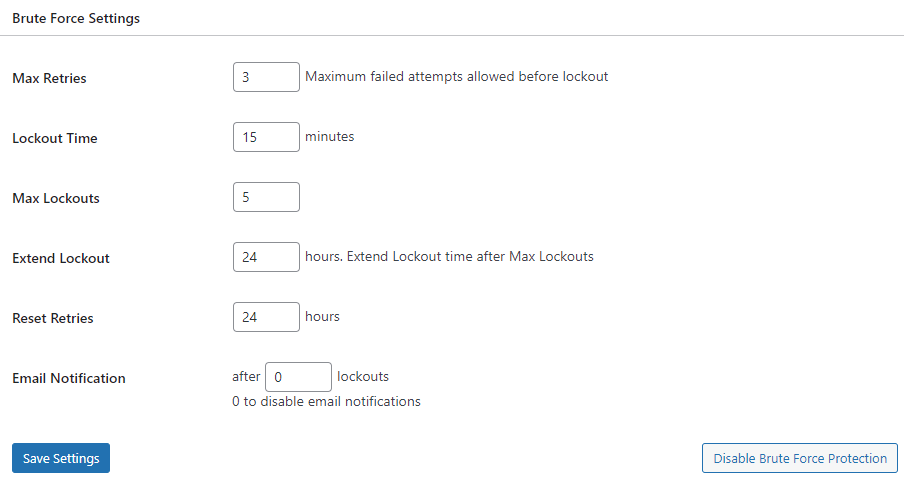
Step 2: You’ll be taken into your “Brute Force Settings” page. There are four sections for the settings for brute force. First, look down until you find ” Brute Force Settings.” You can modify and set several fields within this section. There are unlimited lockout and retries options to protect your website. There will be different fields, such as
Max Retries Enter the number of login attempts that fail, which is sufficient prior to lockout.
Lockout Time Enter the length of time you’d like the duration for the lockout time to last.
The number of Max Lockouts – Enter the number of lockouts acceptable prior to the time an extended lockout takes place.
Extended Lockout – Enter the amount of time you would like an extended lockout.
Reset Retries Enter the number of hours you’d like to reset to have retries be reset.
Email Notification Enter the number of locks that are acceptable prior to receiving an email notification.
You can set and configure the above fields however you’d like. After setting these values, then click ” Save Settings“. You can also turn off Brute Force protection. Brute Force Protection.
Whitelist and blacklist IPs
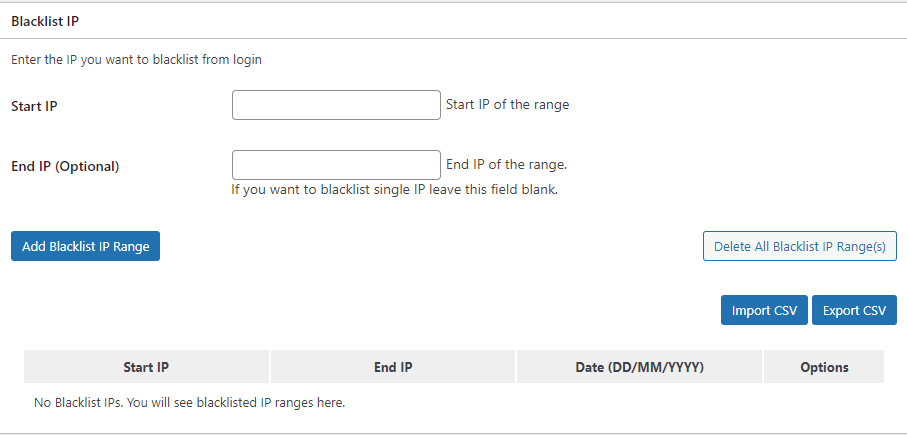
Step 3: Next, go to whitelist and blacklist IPs. You could type the IPs that you wish to whitelist or blacklist. Additionally, you can create a blacklist or whitelist IPs range by clicking to “Add Blacklist and Whitelist range.”
Loginizer Error Message
Step 4: The next step is step 4: The ” Error Message” section. It is possible to customize the error message. Within the Failed Login Try Field you can type in your personal error message. The message will be displayed to the end-user each when the login attempt fails.
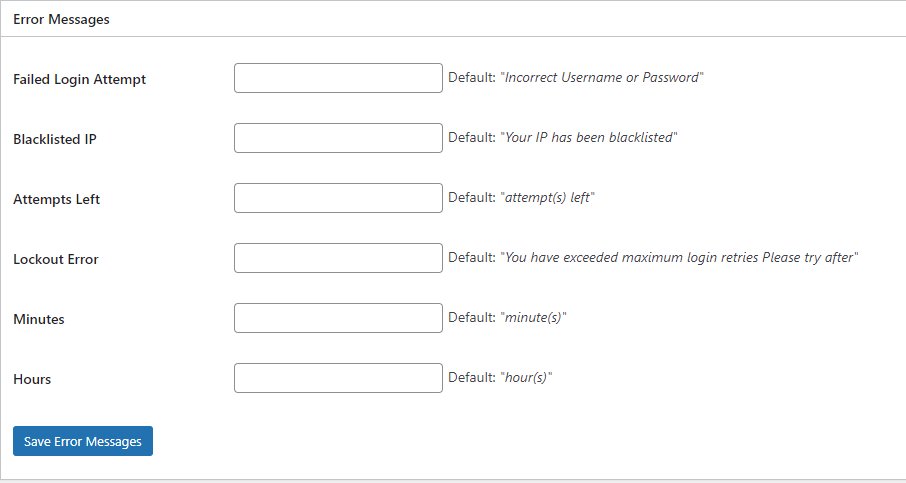
Step 5 5. Step 5: In Step 5: In the Blacklisted IP area, enter your own error message. The message will be displayed in the event that a login attempt was coming from an IP that is blocked. Additionally, you can display error messages for failed attempts, minutes left, lockout errors, hours, and minutes left. Click on the Save Error messages button to save the changes you made.
The organizer plugin only provides brute force settings when you use the version that is free. Other options, like re-captchas, password-less, as well as security settings, are accessible within the Pro version. It is possible to upgrade to the Pro version if you wish to access the advanced features that this plugin offers. This plugin allows users to send security messages to their contacts via tweets.
Conclusion
Loginizer is the most well-known WordPress security plugin on the market. You have a range of choices to safeguard your site from bots that are malicious. The plugin, however, allows users to only access the settings for brute force protection for free. You can also include Re-Captcha to the login, comment, or registration pages. The plugin allows you to set the limits for login retries and lockouts.
Additionally, you can send emails to users in the event of lockouts that are specific to them. You can also whitelist or blacklist the IPs you want to block. The Pro version comes with a variety of advanced options. Installation is easy and fast. Follow the instructions on how you can install and enable the plugin.
We have also provided step-by-step instructions on how to set up your security with Loginizer plugin.

Great keep it up just love it
Really helpful i really love this
Really helpful i really love this
Very nice
And i read this
Very great opportunity for beginners to get educate from it. Very helpful article. Loginizer security method very easy. Keep it up like it.
Thanks. I have successfully installed the plugin and saved my blog.
thank you for this article. It helps me a lot